Riding a bicycle can be one of the most enjoyable ways to stay active, explore new terrains, and commute efficiently. However, ensuring that your ride remains smooth and reliable often comes down to routine upkeep of its most critical component: the chain. A well-maintained chain not only extends the overall lifespan of your drivetrain but also enhances safety, reduces noise, and optimizes every pedal stroke.
Understanding Bike Chains and Their Importance
At the heart of every bicycle’s propulsion system lies the chain. This intricate assembly of interconnected links transfers power from your pedals to the rear wheel. Over time, chains accumulate dirt, grit, and metal particles that can accelerate wear on sprockets and chainrings. Failing to address these contaminants may lead to premature drivetrain replacement or, worse, an unexpected chain failure during a ride.
- Components: Links, rollers, and pins work in harmony to provide smooth engagement with gears.
- Wear Factors: Friction, moisture, and abrasive particles all contribute to chain stretch and degradation.
- Cost Implications: A neglected chain can wear down expensive cassette cogs and chainrings, leading to higher repair bills.
Essential Tools and Materials for Chain Care
Before diving into the cleaning process, gather the following tools and supplies. Having the right gear makes maintenance more efficient and helps you achieve professional-level results.
Cleaning Equipment
- Chain cleaner tool or an old toothbrush for targeted scrubbing
- Soft-bristle brushes to remove stubborn grime
- Microfiber cloths for wiping and drying
Fluids and Solutions
- Quality degreaser formulated for bike components
- Chain-specific lubricant (wet or dry type depending on weather conditions)
- Rubbing alcohol or simple household solvent for final rinse
Protective Gear
- Disposable gloves to keep hands clean
- Old newspapers or cardboard to protect your workspace
- A small container for catching used degreaser
Step-by-Step Chain Cleaning Process
Effective cleaning involves more than just a quick wipe-down. Follow these detailed steps to restore your chain to peak condition.
1. Secure the Bicycle
- Place the bike on a maintenance stand or flip it upside down, resting securely on the seat and handlebars.
- Shift the chain onto the smallest chainring and the smallest rear cog to maximize access.
2. Apply Degreaser
- Pour degreaser into the chain cleaner tool, if available.
- Alternatively, spray or brush the solution onto the chain links until saturated.
3. Agitate and Scrub
- Spin the cranks backward while holding the cleaner tool in place or scrubbing with a toothbrush.
- Focus on each side of the chain to dislodge embedded debris and old lubricant.
4. Rinse Thoroughly
- Use a low-pressure stream of water or wipe the chain with a cloth dampened in clean solvent.
- Ensure no degreaser residue remains, as it can degrade fresh lubricant.
5. Dry Completely
- Pat the chain dry with a microfiber cloth.
- Allow the chain to air-dry for several minutes, especially in humid conditions.
Lubrication Techniques for Optimal Performance
With the chain spotless and dry, it’s time to apply the proper lubricant. Correct application not only reduces friction but also shields the chain from moisture and corrosion.
Choosing the Right Lubricant
- Dry lube: Ideal for dusty or dry environments; it leaves a thin film that attracts minimal dirt.
- Wet lube: Best for rainy or muddy conditions; its water-resistant properties offer extended protection.
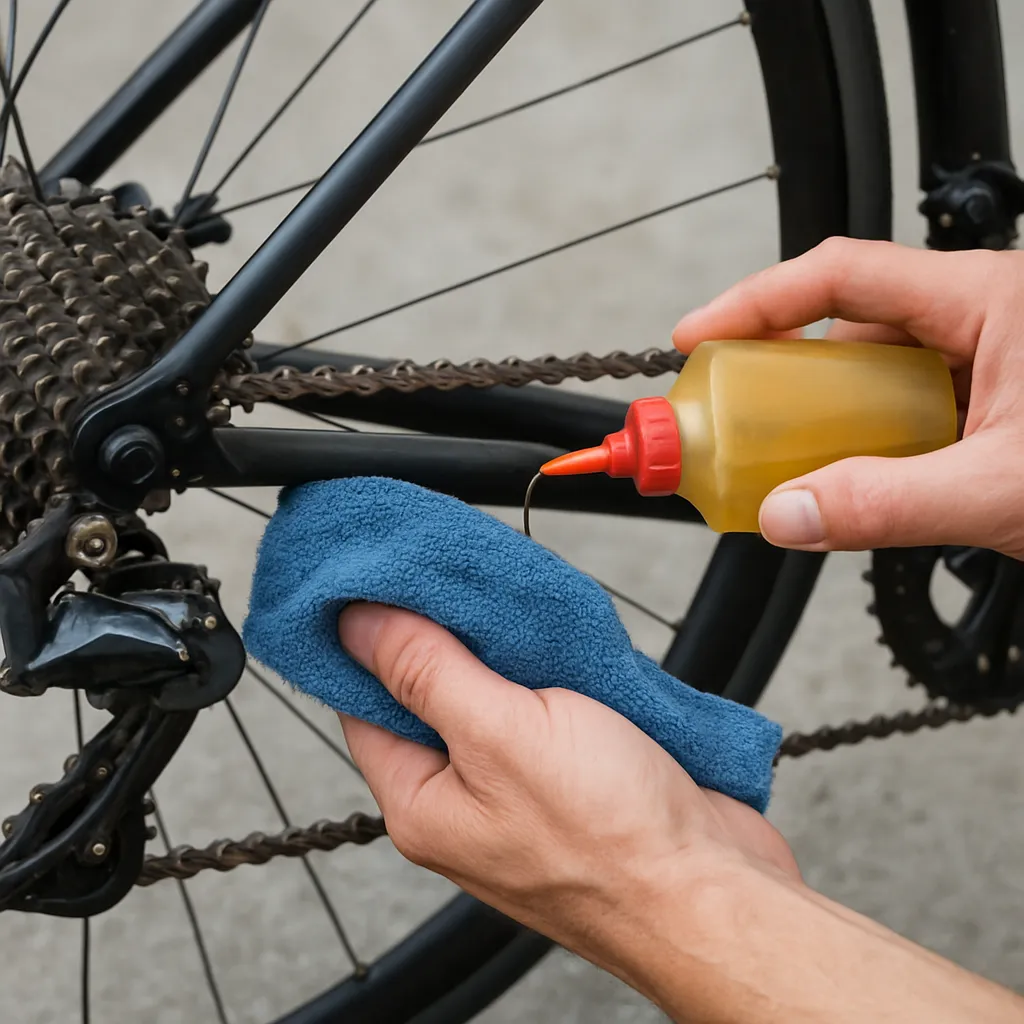
Application Process
- Place the bike back on the stand and rotate the cranks backward.
- Drip a small bead of lubricant into each roller link, ensuring uniform coverage.
- After a full rotation, wipe off any excess with a clean cloth to prevent the accumulation of new debris.
Final Checks
- Shift through all gears to verify smooth transitions.
- Listen for any clicking or skipping sounds that may indicate a missed spot or misalignment.
- Inspect the chain’s tension and alignment to avoid premature wear on cogs and derailleur pulleys.
Troubleshooting Common Chain Issues
Even with regular cleaning and lubrication, chains can sometimes exhibit issues. Here’s how to address typical problems.
Chain Noise and Squeaking
- Cause: Insufficient lubricant or trapped grit.
- Fix: Re-clean affected section and reapply lubricant, focusing on dry links.
Chain Skip or Slippage
- Cause: Worn chain or cassette teeth.
- Fix: Measure chain stretch with a simple tool; replace if it exceeds recommended limits. Inspect and replace worn cassette if necessary.
Corrosion and Rust Spots
- Cause: Extended exposure to moisture without protective lube.
- Fix: Lightly sand rusted areas with fine-grit paper, re-clean, and apply a rust-inhibiting lubricant.
Advanced Tips for Prolonged Chain Life
Implementing a few extra precautions can dramatically extend the performance and longevity of your chain.
- Rotate between two sets of chains if you ride frequently—this spreads wear evenly among cogs.
- Invest in a high-quality chain measured with precision; sometimes a premium option offers tighter tolerances and better protection against elongation.
- Regularly inspect the derailleur hanger alignment to prevent uneven wear on shifting components.
- Keep your drivetrain components free from excessive mud; consider using a fender in particularly dirty conditions.

