
Traveling with a bicycle by airplane can be a rewarding yet challenging endeavor. Whether you’re a seasoned cyclist embarking on an international tour or a weekend warrior exploring new trails, careful planning and attention to detail are vital. From selecting the right packing materials to understanding airline policies, every step contributes to a hassle-free journey and ensures your prized two-wheeler arrives in top condition. This guide will walk you through essential considerations and best practices for flying with your bike safely, efficiently, and confidently.
Preparation and Packing Essentials
Before heading to the airport, invest time in thorough preparation. Begin by reviewing your chosen airline’s baggage regulations and weight limits. Many carriers require advance notice and may levy additional handling fees for sporting equipment. Next, clean your bicycle meticulously to avoid any unexpected biosecurity inspections or damage to packing materials. A simple wash and dry will remove dirt and debris, preventing corrosion during transit.
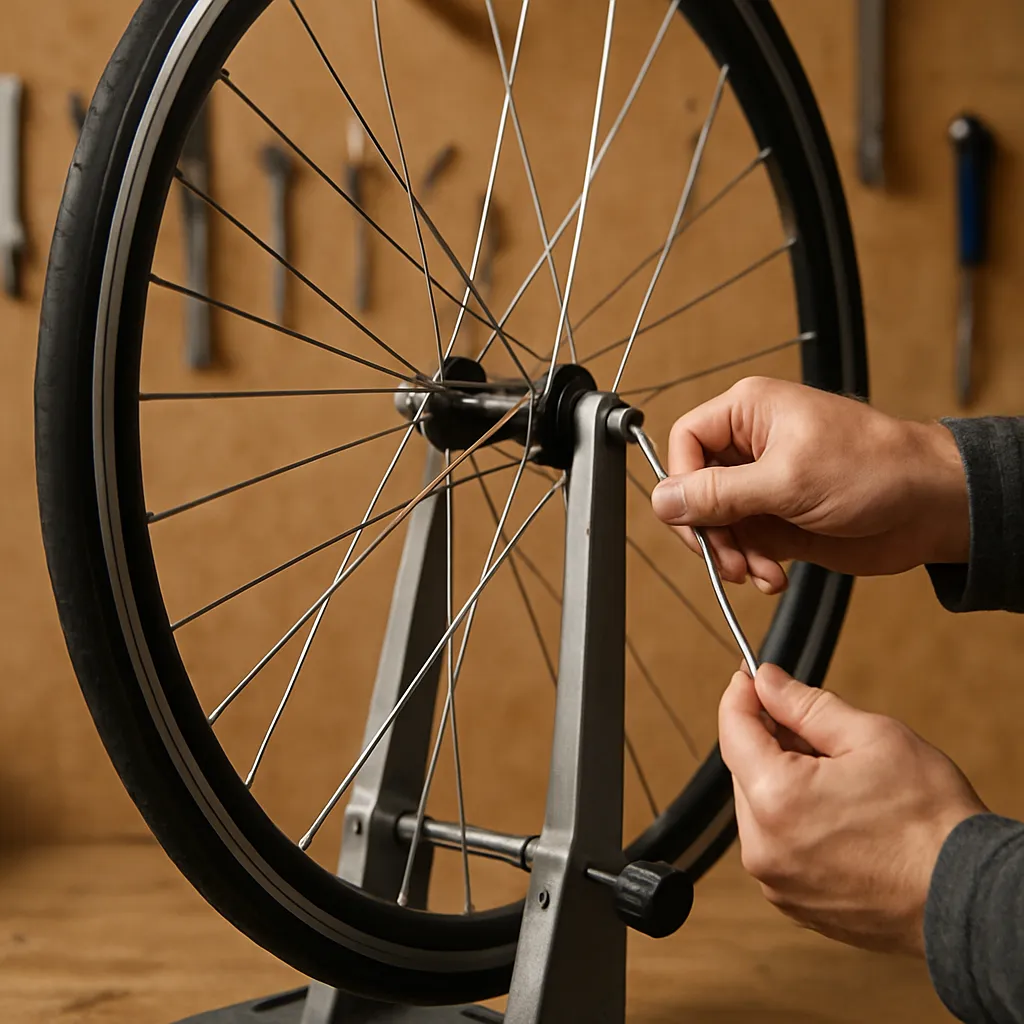
Disassembly plays a central role in compact packing. Remove pedals, saddle, and handlebars, and tuck brake levers to minimize protrusions. Frame protection can be achieved with foam tubing or bubble wrap, focusing on the top tube, down tube, and fork. Secure spokes and derailleur components with zip ties or foam blocks to prevent rubbing against the case walls. Apply padding to delicate parts, such as carbon forks or aero wheels, for enhanced shock absorption.
- Gather tools: Allen keys, pedal wrench, torque wrench
- Pack small items: screws, skewers, quick-release levers in labeled bags
- Use protective covers for the chain and disc rotors
For extra security, consider enveloping the frame in a protective sleeve or cardboard insert. Keep all loose parts together in a transparent bag for swift reassembly upon arrival. Having everything organized avoids last-minute scrambling and potential part loss.
Selecting the Best Bike Case or Travel Bag
Choosing the right container is crucial for safeguarding your bike. Hard-shell cases offer maximum impact resistance and are ideal for long-haul flights or rough handling. Look for reinforced corners, robust locking latches, and integrated wheels for effortless maneuvering. These cases tend to be heavier but provide unmatched protection against crushing or piercing forces.
Alternatively, soft travel bags are lightweight and more convenient to store when not in use. High-quality padded bags feature reinforced frames, internal straps to immobilize the bicycle, and external pockets for tools. While they offer less protection than hard cases, they are often accepted as standard checked baggage, reducing extra fees.
If you’re on a tight budget or prefer a makeshift solution, many bike shops supply cardboard bike boxes for free or a nominal fee. Although durable when properly taped and reinforced, they’re not reusable and offer minimal shock absorption. Always wrap the box’s corners with additional padding to prevent tearing.
Navigating Airport Procedures and Fees
Ahead of your flight, contact the airline directly to confirm its sports gear policy and any surcharges. Some carriers cap dimensions, making secure strapping techniques essential to fit the case within the permitted size. Always weigh your packed bike and tools at home to avoid unpleasant surprises at the check-in counter.
- Declare your bike as sports equipment during booking
- Arrive early to allow extra time for oversized baggage check-in
- Obtain baggage tags with clear “Fragile” or “Oversized” labels
At security checkpoints, your case might be X-rayed. Prepare for a quick inspection by keeping straps unfastened or easily removable. If an officer opens the case, request that the inspection is resealed and tagged. Retain a copy of any baggage irregularity reports (Property Irregularity Reports, PIR) in case damage occurs during transit.
Reassembly and Post-Flight Inspection
Once you collect your baggage, find a clean area to unpack and reassemble. Begin with the frame and follow the reverse disassembly sequence: attach handlebars, reinstall pedals, and resecure the saddle. Use a torque wrench to tighten bolts to manufacturer specifications, ensuring safety on the road.
Conduct a thorough inspection before your first ride. Check wheel alignment, brake function, and gear shifting. Spin the wheels to confirm there’s no rubbing or wobbles. Tighten any loose spokes or bolts, and verify that the chain is properly seated. If you detect significant damage, report it immediately to the airline’s baggage office along with your PIR documentation.
Consider purchasing travel insurance that covers lost or damaged sporting equipment. Such policies often reimburse repair or replacement costs up to a predetermined value. Keep receipts for any emergency repairs performed at your destination to facilitate claims.
Additional Tips for a Smooth Cycling Trip
Research local cycling conditions and carry spare tubes, a multitool, and a compact pump in your onboard luggage. Familiarize yourself with regional regulations regarding helmet use, bike lights, and reflective gear. Always lock your bicycle securely when not in use—portable combination or cable locks are ideal for quick stops.
Engage with local cycling communities or guided tours to explore scenic routes and gain insider tips. Pack weather-appropriate clothing and consider modular panniers or frame bags for multi-day adventures. Taking these extra steps ensures you’re prepared for both the flight and the open road.