Mastering the art of wheel truing is an essential skill for every bicycle enthusiast. Whether you ride for daily commute, weekend adventures, or competitive racing, a perfectly balanced wheel delivers smoother performance and enhanced safety. This guide breaks down the process into manageable steps, highlighting crucial tools, techniques, and best practices. By following these instructions, beginners can gain confidence, avoid common pitfalls, and maintain their bicycle’s wheels like a seasoned mechanic.
Understanding the Basics of Wheel Truing
A true wheel spins without visible side-to-side wobble or vertical hops. Learning the fundamentals will help you diagnose problems accurately:
- Radial Truing: Eliminates up-and-down hops in the rim.
- Lateral Truing: Corrects side-to-side deviations.
- Dish or Centering: Ensures the rim is aligned perfectly over the hub.
Spokes carry tension and transfer your pedaling force to the rim. Uneven tension can cause the rim to deform gradually under stress. By adjusting spoke tension wisely, you control the accuracy of the wheel’s geometry. Familiarize yourself with basic spoke and nipple anatomy before beginning any adjustments.
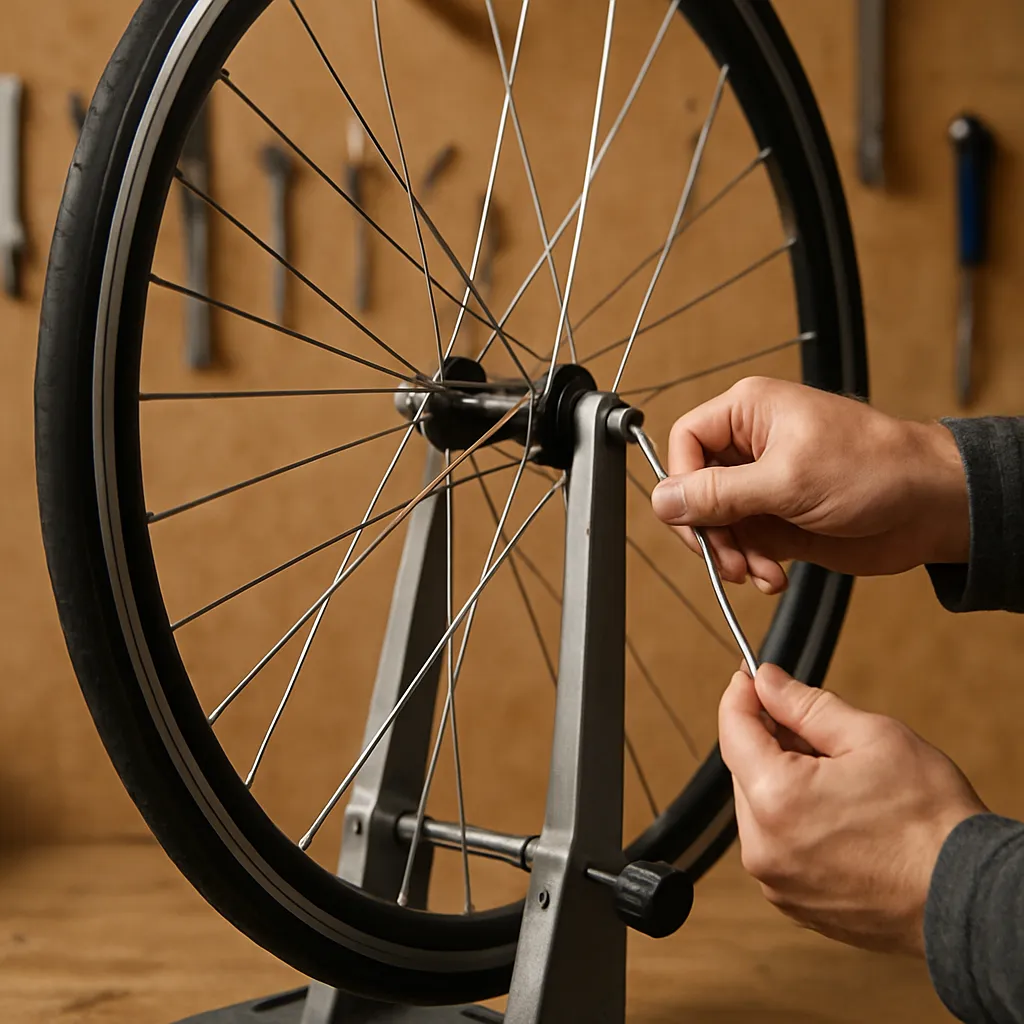
Tools and Preparation for Accurate Truing
Before starting, gather the following tools and set up a comfortable workspace:
- Truing stand or a makeshift frame (bike upside-down on a sturdy surface).
- Marker or zip tie for blemish spotting.
- Wheel dishing tool (optional but recommended).
- Gloves, rags, and safety glasses for protection.
Ensure the wheel is clean; dirt can hide subtle wobbles. Mount the wheel securely in the truing stand. If you lack a dedicated stand, attach the wheel to your bicycle, flip the bike, and use the brake pads or a piece of cardboard as a reference point. Mark the spot with the greatest deviation using a permanent marker or a zip tie on the rim.
Step-by-Step Guide to True a Wheel
1. Checking Spoke Tension
Start by gently squeezing pairs of spokes around the wheel. Tension should feel even; loose spokes cause immediate wobble, while overtight spokes risk broken parts. For a more precise read, use a tension meter. Consistency is key—uneven tension is the root of most truing issues.
2. Correcting Lateral Deviations
Identify the high side by spinning the wheel slowly. When the rim approaches the reference point, stop and note the mark. Tighten the spoke on the opposite side by a quarter-turn with your spoke wrench. Simultaneously loosen the spoke on the same side as the wobble to maintain overall tension balance. Repeat this process around the rim:
- Tighten the spoke two spokes away from the deviation for finer control.
- Always turn nipples in small increments (patience prevents overcorrection).
- After each adjustment, spin the wheel to re-assess the wobble.
3. Addressing Radial Hops
Radial hops appear as up-and-down movements. Tightening spokes on both sides of the hop draws the rim inward; loosening spokes both sides pushes it outward. Work in gradual steps, checking the hop after every few turns. Strive for a smooth contour rather than absolute perfection in one go—this reduces spoke stress.
4. Re-Centering the Wheel (Dish)
A well-dished wheel ensures the rim is centered between the locknuts. Slide a dishing tool over the hub to compare left and right clearances. If the rim favors one side, adjust pairs of spokes: tighten on the side that needs more pull, and loosen on the opposite side. Small adjustments make a significant difference in the rim’s lateral position.
5. Final Tension and True Check
Once wobble and hops are minimized, verify overall tension uniformity. Use your tension meter or manual squeeze tests to ensure each section of the rim responds evenly. Spin the wheel under load (on the bike with weight) to detect any last-minute deviations. Fine-tune as necessary.
Maintenance and Troubleshooting
Routine maintenance prolongs wheel life and prevents major issues. After heavy rides or rough terrain, inspect your wheels for new wobbles or loose spokes. Keep spokes clean, and apply a drop of light oil at the nipple seats to prevent corrosion and ease future adjustments.
- Check tension every 100–200 miles of riding.
- True the wheel after any significant impact (pothole, curb hit).
- Replace damaged spokes promptly to avoid rim cracks.
Common troubleshooting scenarios:
- Persistent side wobble: Inspect spoke tension around the entire circumference; one loose section can affect multiple areas.
- Sudden tension loss: Check for broken spokes or damaged nipples.
- Rim wear: In severe cases, deep braking grooves or corrosion may require rim replacement rather than truing.
Building Confidence Through Practice
Wheel truing blends technical precision and hands-on intuition. Each wheel teaches unique lessons—spoke patterns, tension limits, and rim behavior vary across bicycle types. With experience, you’ll develop a keen eye for subtle deviations and efficient adjustment patterns. Celebrate small victories: a wheel that spins quietly and straight is a testament to your growing mechanical expertise.
Expanding Your Bicycle Maintenance Skillset
Wheel truing is a gateway to broader repair capabilities. Once comfortable, explore:
- Hub servicing (bearing adjustment and lubrication).
- Brake and drivetrain tuning.
- Wheel building from scratch (lacing spokes and tensioning).
Combining these skills fosters a deeper understanding of bicycle mechanics and empowers you to handle most workshop tasks at home. Embrace the learning curve, and soon you’ll approach every maintenance challenge with confidence and precision.

