Riding a bicycle along winding roads can quickly turn into a frustrating experience when the chain snaps unexpectedly. Whether you’re on a remote trail or navigating city streets, knowing how to perform a quick fix can save your ride and prevent lengthy delays. This guide walks through the essentials of diagnosing a broken chain, selecting the right tools, and executing an effective repair to restore your durability on two wheels.
Understanding Chain Breaks
Before diving into repairs, it’s crucial to understand why chains fail. A bicycle chain is a complex assembly of alternating plates, rollers, pins, and bushings designed to transfer power from pedals to the rear wheel. Over time, repeated stress and environmental exposure lead to wear and eventual fracture. Common causes of chain breaks include:
- Excessive tension from misaligned gears
- Corrosion due to insufficient lubrication or harsh weather
- Sideways stress when cross-chaining (using extreme gear combinations)
- Physical damage from debris or accidental impact
- Manufacturing defects or poor-quality materials
Recognizing early warning signs—such as noise during shifting, chain skipping under load, or visible elongation—can prevent a sudden breakdown. When a chain finally snaps, you’ll usually notice a sharp drop in tension and a small metal pin or link left on the road.
Essential Tools for On-the-Road Repairs
Carrying a minimalist repair kit can turn a potential disaster into a minor hiccup. Here are the key tools every cyclist should have:
- Chain tool: A compact device for driving pins out of chain links.
- Master link or quick-link: A reusable connector that allows you to rejoin the chain without specialized tools.
- Pliers or multi-tool pliers: Useful for handling the master link and adjusting chain tension.
- Screwdriver: Handy for nudging plates and aligning links.
- Small chain lube bottle: Restores smooth operation after repairs.
- Zip ties or cord: Temporary solutions for securing a damaged section until a complete replacement is possible.
While a full-fledged toolbox offers the best results, even a minimal kit weighing under 200 grams can keep you rolling. Familiarizing yourself with each tool’s operation before heading out will minimize confusion when time is critical.
Step-by-Step Guide to Repairing a Broken Chain
Follow these steps to restore your chain’s integrity and get back on the road:
1. Secure the Bicycle
Shift to the smallest chainring and smallest rear cog. Flip your bicycle upside down or lean it against a stable surface to allow easy manipulation of the drivetrain.
2. Remove the Damaged Link
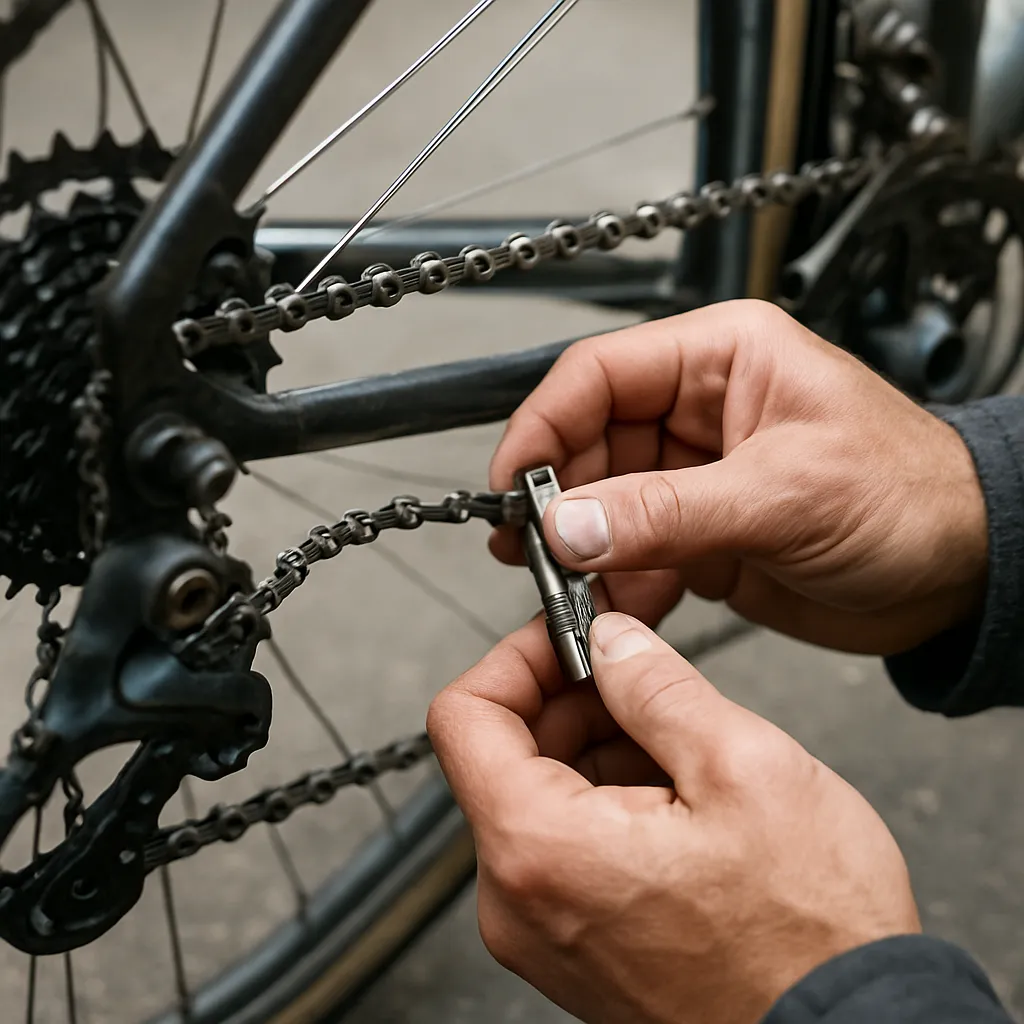
Locate the broken section and use the chain tool to push out the pin on one side of the damaged link. If a master link is present, disengage it by squeezing with pliers. Extract the damaged plate and pin entirely.
3. Measure and Shorten if Necessary
With a broken link removed, the chain may become too short. Count links on both sides, making sure to end with one inner and one outer plate for reconnecting. Remove an additional pair of plates if needed, using the chain tool carefully. Avoid removing more than two additional links to preserve proper gear compatibility.
4. Reconnecting the Chain
If using a master link:
- Insert each half of the master link into the chain ends.
- Squeeze the link halves together until they click into place.
- Rotate the pedals backward while gently applying tension to seat the link fully.
If you have to reuse a standard chain pin:
- Insert the fresh pin provided with many chain tools.
- Align the outer plates and use the chain tool to press the pin flush, avoiding overdriving it beyond the plate surface.
5. Test and Fine-Tune
Gently pedal the chain through all gears, observing its engagement with each cog. Listen for any grinding sounds indicating misalignment. Apply a few drops of lubrication to ensure smooth operation. If the chain feels tight or skips, adjust the derailleur’s high and low limit screws until shifting is crisp.
Preventive Maintenance and Tips
Preventing a broken chain is preferable to fixing one on the roadside. Here are best practices to extend chain life and avoid future mishaps:
- Regularly clean your drivetrain to remove grit and old lubricant, which accelerates wear.
- Apply lubrication after every 100–150 miles, focusing on the rollers and pins.
- Check chain wear with a simple ruler or chain gauge tool; replace the chain before it elongates beyond 0.5% on road bikes or 0.75% on mountain bikes.
- Avoid cross-chaining by not using extreme gear combinations (e.g., big chainring with big cog).
- Keep a fresh master link on hand; these are inexpensive and incredibly useful in emergencies.
- Inspect the derailleur hanger alignment and jockey wheels for damage, as misalignment puts uneven stress on the chain.
By combining routine maintenance and preparedness in your repair kit, you can minimize the chances of being stranded by a broken chain. With practice, roadside fixes become second nature, allowing you to tackle any trail or commute with confidence.